
There’s something truly special about creating your own Gluten Free Hot Dog Buns from scratch. Fresh out of the oven, they are perfectly golden with a tantalizing soft texture that simply begs to be filled with your favorite hot dogs. The aroma wafts through the house, making it impossible to resist grabbing one to taste. Honestly, they’ve become a staple in my kitchen, especially during summer barbecues or cozy family movie nights when the craving for comfort food strikes.
What I love most about these buns is that they come together surprisingly fast! They’re incredibly versatile—not just for hot dogs but also fantastic for sandwiches, sliders, or even served alongside a hearty chili. And if you happen to have leftovers (which is rare in my house!), they freeze beautifully, so you can enjoy that fresh-baked goodness anytime.
Why I Love Gluten Free Hot Dog Buns
I adore this Gluten Free Hot Dog Bun Recipe for so many reasons! First off, it’s incredibly easy and undeniably delicious. The fluffy, tender interior perfectly contrasts with the slightly crispy exterior. Plus, there’s something so rewarding about pulling loaves of homemade buns out of the oven that makes me feel like a kitchen rockstar! Whether it’s a gathering with friends or just a cozy night in, these buns hit that sweet spot every time at my table.
Gluten Free Hot Dog Bun Ingredients
The magic of this Gluten Free Hot Dog Bun Recipe truly lies in the combination of dry ingredients and the hydration of the dough. Don’t worry about exact measurements just yet; those are all in the recipe card for you!
Essential Components
- 2 1/4 CUPS ALL PURPOSE GLUTEN FREE FLOUR BLEND: (I used Better Batter; click through for details) These are the stars that create the structure of your buns!
- 1 TEASPOON XANTHAN GUM: This ingredient adds elasticity and binds everything together (omit if your blend already contains it).
- 5/8 CUP TAPIOCA STARCH/FLOUR: This ingredient gives that delightful chewy texture we love!
- 1 TABLESPOON INSTANT YEAST: A must for achieving that beautiful rise.
- ¼ CUP GRANULATED SUGAR: Balances the flavors and helps with browning.
- ½ TEASPOON KOSHER SALT: Enhances all the flavors in our buns.
- 1 1/8 CUPS WARM MILK: (about 95°F) It acts as the liquid gold that brings everything together.
- 1 EGG: At room temperature for added richness and binding.
- 4 TABLESPOONS UNSALTED BUTTER: Melted and cooled, it adds a decadent touch.
- EXTRA VIRGIN OLIVE OIL: For drizzling—this helps get that golden crust.
- 6 GLUTEN FREE HOT DOGS: For serving (optional) but definitely recommended!
Need a Swap?
Want to switch things up? If you don’t have tapioca flour, you can use cornstarch as a substitute, though it won’t be quite as chewy. For a dairy-free version, feel free to swap the milk with a plant-based alternative like almond or oat milk. You can also use a flax egg in place of the regular egg for a vegan option! Just keep in mind the overall texture may vary slightly.
Kitchen Tools You’ll Need
- Stand mixer (or large mixing bowl and wooden spoon)
- Sharp knife or metal bench scraper
- Rectangular baking pan (5-inches wide)
- Measuring cups and spoons
- Whisk
- Plastic wrap
Let’s Dive into Creating These Irresistible Buns
Follow along, and you’ll have a delicious meal in no time. We’re aiming for fluffy, tender buns that hold all your favorite fillings!
Prep Your Pan and Oven
First, grease a rectangular baking pan very lightly or use a nonstick baking pan. The ideal pan is rectangular and about 5 inches wide. Set your oven to preheat at 350°F while we get our dough ready!
Combine Dry Ingredients
In the bowl of a stand mixer, place the gluten free flour blend, xanthan gum, tapioca starch, instant yeast, and granulated sugar. Whisk to combine well, then add the kosher salt and whisk again. This solid mix helps achieve that desired rise and texture!
Beat in the Wet Ingredients
Next, add the warm milk, egg, and melted butter into the mix. Using the paddle attachment, beat vigorously. The mixture will come together into a clump and clear the sides of the bowl. Keep beating for about 5 minutes until it looks whipped and sticks slightly to the sides of the mixing bowl again.
Let it Rise
Once you have that lovely dough, transfer it to a lightly oiled container with a tight-fitting lid. This container should be large enough for your dough to nearly double (although it most definitely won’t double!). Set it aside at room temperature for at least 2 hours, or up to 24 hours in the fridge if you’re prepping ahead of time.
Portion and Shape
When the time is up, if you’ve let the dough rest in the fridge, let it warm up a bit. Divide the dough into 6 equal portions with a sharp knife or metal bench scraper. Working with one piece at a time, knead it in your clean, dry hands (without adding any flour), pinching any seams that separate. Then shape it into a cylinder about 4.5 inches long. You want them smooth and ready for the next step!
Arrange and Second Rise
Place these shaped pieces of dough in your prepared pan, spaced just over 1-inch apart, ensuring they don’t crowd each other. Cover the pan with lightly greased plastic wrap and find a cozy, warm spot for them to rise until they’re about 150% of their original size. Keep an eye on them; this could take anywhere from 45 minutes to an hour, depending on your room temperature!
Pre-Bake Olive Oil Finish
When your rolls are nearly there, drizzle them lightly with olive oil. Using clean hands or a pastry brush, spread the oil evenly over the top and sides. This will give them that beautiful, glistening finish!
Bake to Golden Perfection
Finally, place your pan in the center of the oven and bake for about 20 minutes or until they’re lightly golden brown. An instant-read thermometer should read around 190°F when inserted into the center of the rolls.
Cool and Serve
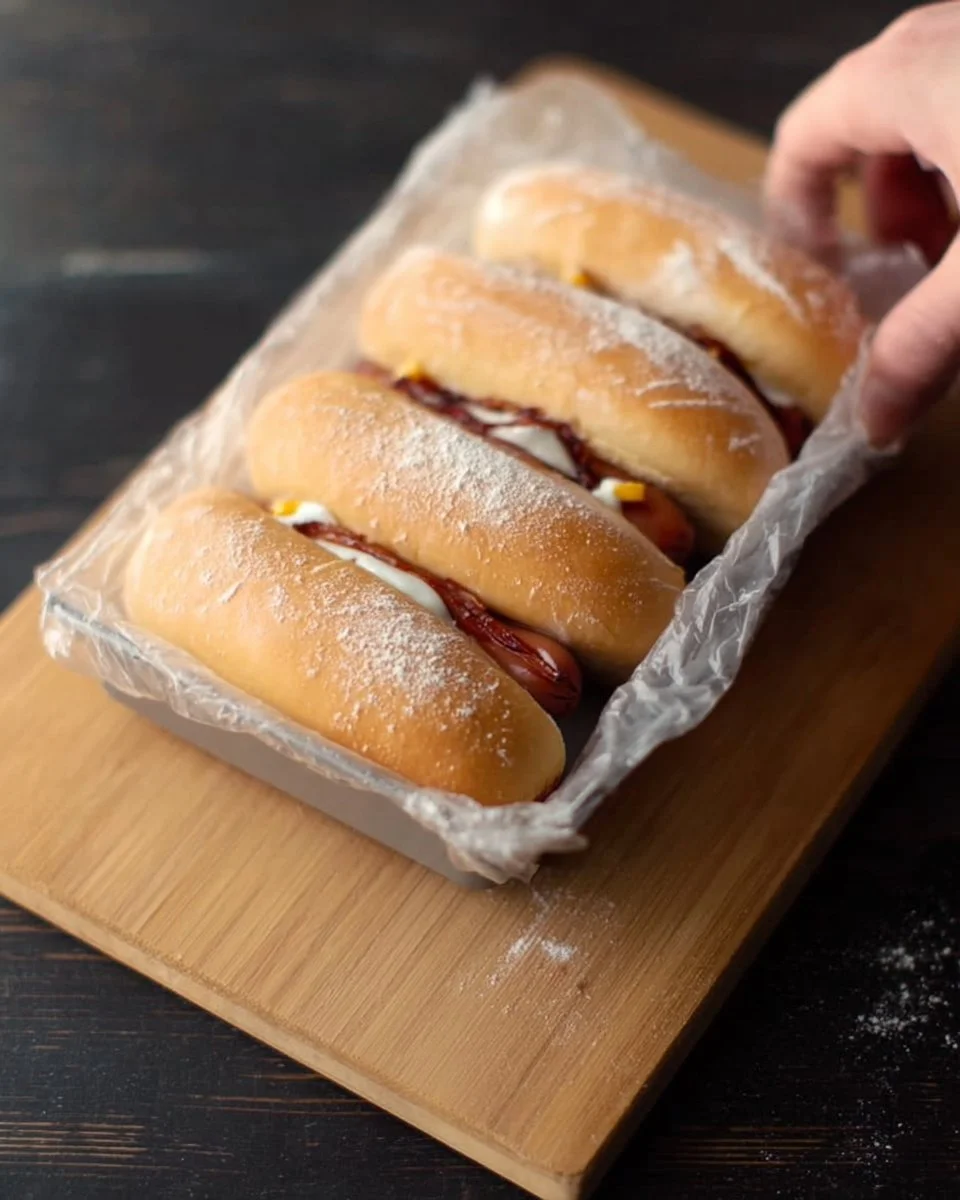
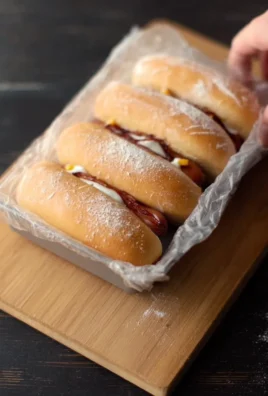
Remove the pan from the oven and let the rolls cool in the pan, covered loosely with a tea towel for about 10 minutes. Slice each bun along one long side for a space to hold your hot dog and load them up with your favorite toppings!
How to Store Gluten Free Hot Dog Buns
These buns are best enjoyed fresh but can be stored at room temperature for up to a day. For refrigeration, keep them in an airtight container for up to 3-4 days. If you want to save some for later, they freeze beautifully for about 2-3 months. Just thaw them at room temperature or pop them in the microwave for a few seconds to warm them up!
Tips for Success
- Don’t overmix! Stop once the dough has come together but still looks fluffy.
- Allow your shaped buns enough space while rising; they need room to grow!
- If your rolls look a little uneven after shaping, don’t worry—handmade charm is welcome!
- Use a good quality gluten-free flour blend for the best results.
Serving Suggestions
- Serve with grilled veggies for a heartier meal.
- Pair with homemade chili for a delicious value pound.
- Add vibrant toppings like fresh onions, tomatoes, and mustard.
- Enjoy alongside a crisp salad for a lighter option.
- Grab your favorite cold brew or lemonade to complement those buns!
Now, gather your loved ones, and let’s make this happen together. You’ll see just how satisfying homemade Gluten Free Hot Dog Buns can be! Happy baking!

Leave a Comment